Easy DIY Wood Floating Shelves for Beginners on a Budget
Want to add a touch of modern elegance and practicality to your home without breaking the bank? Look no further than DIY wood floating shelves! They're a fantastic way to showcase your favorite items, declutter your space, and elevate your décor. This project is surprisingly easy, even for first-time DIYers, and can be completed on a budget. Let's dive into the steps to creating these stunning shelves.
Gather Your Supplies
Before you embark on your DIY journey, make sure you have all the necessary materials. Here's a list of what you'll need:
Materials
- Wooden boards (choose your desired length and width, considering the weight they'll support)
- Wood stain or paint (optional, for a personalized touch)
- Wood glue
- Screws (matching the wood type)
- Brackets (choose a size and style that suits your shelf design)
- Level
- Measuring tape
- Pencil
- Drill with drill bits
- Safety glasses
Tools
- Saw (for cutting the wood to size)
- Sandpaper (for smoothing the edges)
- Paintbrush or roller (if using stain or paint)
- Screwdriver or drill driver (for attaching the brackets)
Prepare the Wood
Start by cutting your wooden boards to your desired lengths using a saw. Ensure your measurements are accurate to create perfectly balanced shelves. Once cut, smooth the edges using sandpaper to prevent splinters and create a polished finish. Now's the time to add a personal touch! Apply wood stain or paint if you want to enhance the look of your shelves. Let the finish dry completely before proceeding.
Install the Brackets
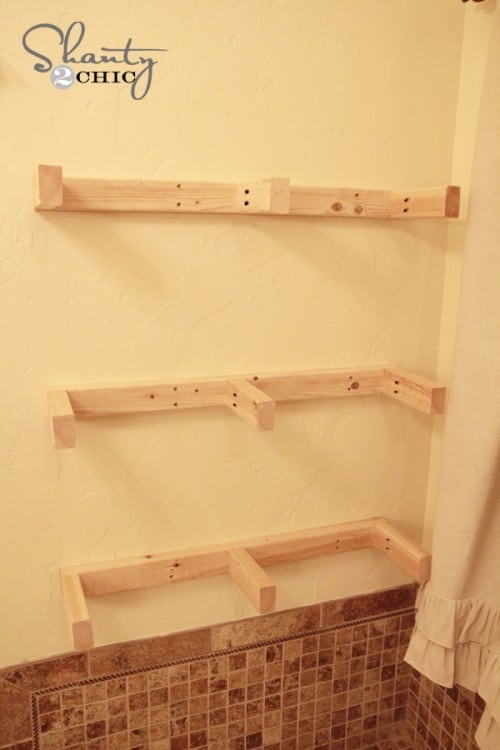
The next step is to install the brackets. This is where a level comes in handy! Use a pencil to mark the locations for the brackets on the wall, ensuring they are level and spaced evenly. Pre-drill pilot holes using a drill bit slightly smaller than the screw size to prevent the wood from splitting. Finally, attach the brackets to the wall using screws, ensuring they are securely fastened.
Attach the Shelves
With the brackets in place, you can attach the shelves. Carefully apply wood glue to the back of the shelf where it will meet the bracket. Gently slide the shelf onto the bracket, ensuring it sits flush and level. For added support, secure the shelf to the bracket with screws from the bottom, driving them into the predrilled holes in the shelf. Repeat this process for all the shelves you're creating.
Enjoy Your New Shelves
Congratulations! You've just built beautiful, functional floating shelves with your own two hands. Now it's time to style them! Arrange your favorite books, decorative objects, and personal treasures on your new shelves. Let your creativity flow and personalize your space with this easy and affordable DIY project.


No comments:
Post a Comment